Monday 28 October 2013

Vintage finds

Mainly Kitsch and Clocks from the 50s 60s and 70s
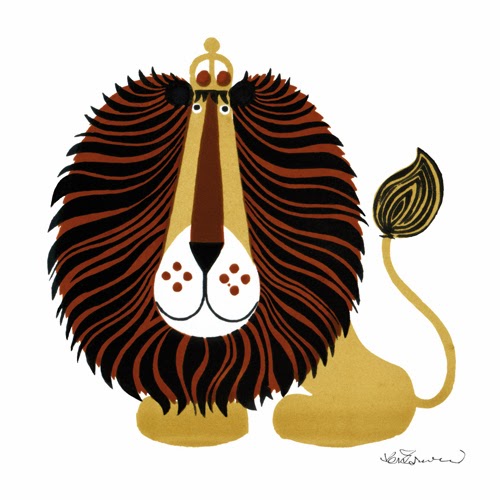
Kenneth Townsend:

Over the past couple of years I have been collecting his work, from charity shops and carboot sales.  I adore the humour and warmth of his work, which is so evocative of the era I grew up in. 

1960s 1970s Merit Marble Fun Game.
My childhood was predominantly spent in the 1970s;  yes, power blackouts, teachers' strikes and home made bread, due to the bread strike were all exciting to me and full of adventurous ways to spend our time.
 1960s Chance glass London Series dish
  
  1960s Chance glass London Series dish
Beefeater 
Galt Memory game, Remember, Remember 1970s

Hornsea Pottery 1970s LOVE MUGS series
1 for each month

 
1960s Chance glass London Series dish Coldstream Guard
 
Only a small collection, but starting to grow.


How to draw a bird

Animalarium: Sunday Safari - The Color of Spring Songs

Monday 30 September 2013

This week's makes

A weekly diary of all things made in our house
Most of these ideas are from tutorials on my Pinterest boards, CLICK HERE TO SEE 

30.09.13
Atomic Starburst upcycled vintage map clock


Plants vs Zombies Halloween crochet hat

To make this I used, aran (worsted weight) yarn.  I think it is a shade too dark and a lighter grey would work better.  I followed  a basic pattern for an earflap hat; I used this free pattern from Repeater Crafter Me blog
There is also an eye featured in this pattern which I just adjusted by adding extra rows to make one larger, then I embroidered on the small black pupils with a wool needle.  This is an easy to follow tutorial on crocheting circles for beginers too.  
The mouth I built up from a chain of about 6, worked in Double crochet UK, (Sc US) increasing at the edges by adding extra stitches to the end of rows.  I embroidered the teeth shapes with white wool and double crocheted around the outside edge with black wool.  My son and his friends adore this hat and it has become a favourite amongst them.

Vintage 1950s Midwinter stylecraft red rose plate, made into a clock 


Super easy and looks really impressive.  It is so exciting the first time you drill through a plate!!!  I used a hand drill for this, as our electric one suddenly packed up and it was all I had at the time.  

You will need to buy a ceramic cutting drill bit, very inexpensive for a set of 5, they have fin shaped side and go through the ceramic easily without chipping, if you make sure you add a cross of masking tape to the centre of the plate where your drill bit will enter. Add a quartz clock movement, again inexpensive and you can have some fun choosing the right one with appropriate style, colour and size for your plate.  These have been really successful gifts as you can choose a plate just right for the person you are making it for.

5.10.13

DIY Cardboard box Robot 
made with Daddy - 26 packing boxes and as big as our little one.


Large, black and white, crochet rag rug,
 Made from t shirts and sheets. Took longer than a week, but finished this week


DIY Christmas Baubles
Small balloons, PVA glue soaked wool, sequins and some very sticky hands.
Worth the mess, as squeals of delight await their unveiling.
Couldn't wait for Christmas to hang them!


7.10.13  
 
 Crochet Macrame style Owl wall hanging. 
A present for Pat, who loved these the first time round.
I found the  pattern here: http://uniqueearthling.co.uk/macrame-style-hanging-owl/
by Thomasina Cummings.


SPICED FIG & PLUM TART
Figs and plums from the neighbouring trees, made with honey, walnuts, a cinnamon, nutmeg, cloves and cardamon spiced, sugar and Kirsch glaze.


DIY Pine Cone Christmas Tree and people Decorations
Still waiting to dry here, stood in modelling clay.  We have since added gold thread to hang them on  the Christmas tree.  Great fun and  we had a fantastic afternoon in the woods collecting the supplies. 


Jack Skellington Crochet Hat
Nightmare before Christmas hat, perfect for Halloween.  One of my son's favourite characters.  Great to hear the laughter, when he came down to find this waiting for him this morning.
Again using the basic Earflap hat, which I used for the Zombie hat.
I then found this great tutorial on how to shape his eyes.

20.10.13
Forest Crochet hood hat, Granny Scarf and stripy gloves.

I am determined to be warm this winter!!!


 So I found myself a few easy patterns and tied them together with a  colour palette which goes perfectly with my navy duffle.  
C'mon snow I dare you.
Links to Free patterns
Forest Girl Hood by A Crafter
I added a turquoise cotton lining to this hat for extra warmth
Artic Scarf By Sarah London
Red Heart Crochet gloves in 3 sizes 
I Doubled up on the width of the stripes

Nearly finished my other project for this week, a crochet Tinkerbell fairy hat and leaf Pom pom scarf, for a friends, little girl - one piece of ribbon away from completion and coming soon.

Plants vs Zombies Peashooter Amigurumi Crochet


Little fella for my son, not quite finished, 2 leaves left and already been favoured and played with:

Got this free pattern from someone very clever with a super blog

1st November 2013

Tinkerbell fairy Crochet hat with leaf and pom pom scarf 
Been ultra busy this week, making halloween treats and going to school discos.

The ribbon finally arrived to finish of this Tinkerbell hat and scarf for a friends little girl.  

 I am always looking for good ways to display hats, so I crocheted a mannequin head to show it off.  I am already working on a whole cast of these, so will pop up the tutorial when I've finished,  they are a fun way to display your crochet projects.


For the hat I did a little tweaking to the free pattern from here: Sarah's free Crochet Patterns Blog
The scarf I made up from half treble stitches (HDC U.S.) with a crocodile decreasing end joined on and a white pom pom, just like the one Tink has on her shoes.


Blue & White Striped Vintage Plate Kitchen wall clock


With the some inexpensive equipment and a little care, these are wonderfully effective gifts to make.  I will add a tutorial over the next few weeks.
Shelf Sitting Father Christmas Card

Phew, 
I have been so busy the last few weeks making, mending selling etcc, that I have had so little time to write here.  Have taken lots of photos, to postr a homemade Christmas post next week, so in the meantime thought I would quickly post up this little fella ( as my 4 year old calls him!!)

My son's teacher had the wonderful idea of each child making a card for the whole class at home, instead of individual cards.  These will go up on the Christmas display board and here is our team effort.

For this we used
a plain blank card
Glue
 kitchen roll tube
paints or felt tips
googly eyes
felt
2 lolly sticks
pipe cleaner
and soft toy filler

Cut a kitchen roll vertically in half leaving 6 long tabs across the top middle and bottom edges, these will be used to adhere the body shape to the card.

Pencil a Santa shape onto your tube, colour and use sequins, soft toy filler, paints etc for his body belt beard and face.  Stick on 2 red lolly sticks - one for each arm.  Use felt shapes for his gloves.

Stick the body to the card using the tabs you created initially when cutting out.
Bend a pipe cleaner in half and glue to the inside of the tube, on the card surface, leave to dry lying flat.
Cut out two rectangles of felt and glue to the bottom of his legs, when dry shape into boot shapes and add some toy filler for fur.

Place him on a shelf, enjoy.